Monday, 23 December 2013

Simple Screen Shake

Lots of games add excitement by using screen shake, when your character gets hit or on certain events a little rumble really lets the player know something has occurred. While prototyping some features of Endure I revisited some old code to add a small rumble when the fishing line breaks:

Small Screen Shake


Large Screen Shake (Over the top)


Code (Simple Rumble Class)

Pastie Source Code

 
public class Rumble {

  public float time;
  Random random;
  float x, y;
  float current_time;
  float power;
  float current_power;

  public Rumble(){
    time = 0;
    current_time = 0;
    power = 0;
    current_power = 0;
  }
  
  // Call this function with the force of the shake 
  // and how long it should last      
  public void rumble(float power, float time) {
    random = new Random();
    this.power = power;
    this.time = time;
    this.current_time = 0;
  }
        
  public void tick(float delta, GameController gc, Hero hero){
      // GameController contains the camera
      // Hero is the character centre screen
    
    if(current_time <= time) {
      current_power = power * ((time - current_time) / time);
      // generate random new x and y values taking into account
      // how much force was passed in
      x = (random.nextFloat() - 0.5f) * 2 * current_power;
      y = (random.nextFloat() - 0.5f) * 2 * current_power;
      
      // Set the camera to this new x/y position           
      gc.camera.translate(-x, -y);
      current_time += delta;
    } else {
      // When the shaking is over move the camera back to the hero position
      gc.camera.position.x = hero.x;
      gc.camera.position.y = hero.y;
    }
  }      
}

This is all the code to achieve a basic screen shake. The timer for the affect works its way down to zero then stops. For large shakes once the rumble is over it will snap back to the character and look very jumpy but this is just a prototype.

To use the class create a new instance of it then conditionally produce a new RUMBLE! Below you see on the line snapping a small shake takes place by changing the power and time parameters, then the main render loop just needs to call the tick function:


public Rumble  rumble;
this.rumble = new Rumble();

if (line.tension > line.max_tension){ // LINE SNAP
  gc.rumble.rumble(.2f, .1f); 
  state = STATE.IDLE;
}

if (gameController.rumble.time > 0){
  gameController.rumble.tick(delta, gameController, hero);
}
So there you go a nice feature to add to any game that could do with some atmosphere or excitement, could be progressed much further and also be used in loads of ways, great for explosions, thunder storms etc. Thanks for reading !_!

Friday, 13 December 2013

Endure gets a new Tile Set

The old tile set had over 20 tiles and updating it was a nightmare. It was time to change the tiles to a much neater and simpler design.

If we are ever going to hire a designer/artist to change the assets for this project then the fewer key elements the better.

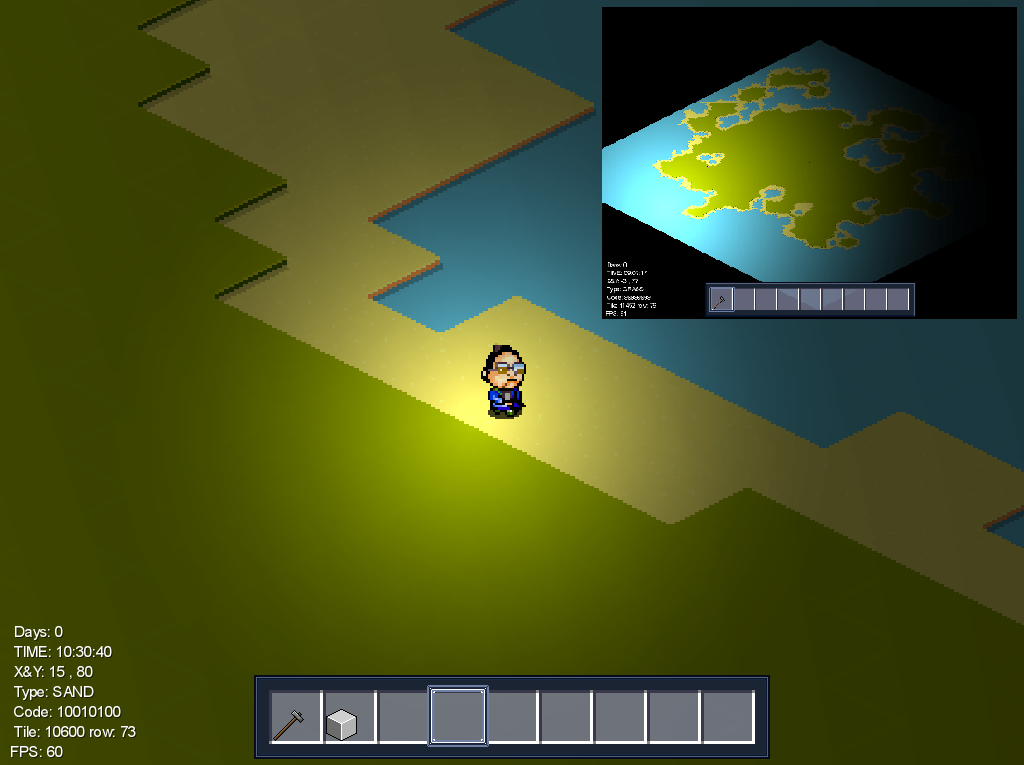
So here is a quick look at the new look map:

The number of shadows required is much less than the tiles needed for the old top down view. This new simple design will allow the addition of varied height of blocks for building and jumping etc.

Example of old tile set.


Sunday, 8 December 2013

Newest Feature Boats

Newest feature added into the game is boats, used to travel quicker in water. Still need some visual affects added but the basics work ok.


Tuesday, 26 November 2013

Pixel Brushes for PhotoShop

10 Top Free Pixel Brush Sets (View All)

Want to do some pixel drawing? Fed up of painting on pixel at a time and getting the angles wrong as you are a newbie like myself then check out these neat brush sets to help you along:

Here are 3 that I added to PhotoShop, click click ...


Wednesday, 20 November 2013

Game Update: Forests, day / night cycle, fash light

Update on working features within the game:

 ◘ Inventory
 ◘ Crafting
 ◘ Weapon
 ◘ Tool
 ◘ Zoom
 ◘ Day / Night cycle
 ◘ Day Count
 ◘ Flash Light
 ◘ Random Map Generation
 ◘ Random Forest Area


Whats next


Not all trees should be fully grown
Trees to break down into wood and leaves
Swimming - hero should sink and slow down in water
Sun should move across map (Currently Static position)
Add other living entities
Add more tools
Hero HP / Hunger
Add enemy spawn points with basic enemy

Tuesday, 19 November 2013

LibGDX Lighting - Day / Night cycle

Recently researched the use of a Shader in libGDX to create a simple day/night cycle. Found some basic tutorials to create a fire at night affect including: Lightmap Shader This basically adds a tint to the background and overlays an image to create a spotlight.

Initiating vars etc:
Vector3 bright = new Vector3(6.3f, 6.3f, 6.7f);
// Load shaders from text files
vertexShader = Gdx.files.internal("data/shaders/vertexShader.glsl").readString();
defaultPixelShader = Gdx.files.internal("data/shaders/defaultPixelShader.glsl").readString();
finalPixelShader =  Gdx.files.internal("data/shaders/pixelShader.glsl").readString();

ShaderProgram.pedantic = false;
defaultShader = new ShaderProgram(Art.vertexShader, Art.defaultPixelShader);
finalShader = new ShaderProgram(Art.vertexShader, Art.finalPixelShader);currentShader = finalShader;
ambientColor = bright;
 
finalShader.begin();
finalShader.setUniformi("u_lightmap", 1);
finalShader.setUniformf("ambientColor", ambientColor.x, ambientColor.y, ambientColor.z, ambientIntensity);
finalShader.end();
// Image for spot light 
light = new Texture(Gdx.files.internal("data/shaders/light.png"));
fbo = new FrameBuffer(Format.RGBA8888, 1024, 788, false);

finalShader.begin();
finalShader.setUniformf("resolution", 1024, 788);
finalShader.end();

Render Loop
After setting up the variables and shader files in the render loop I adjusted the ambientColor over time to give affect of night day.

// Adjust ambientColor to give appearance of night/day  
finalShader.begin();
finalShader.setUniformi("u_lightmap", 1);
finalShader.setUniformf("ambientColor", ambientColor.x, ambientColor.y, ambientColor.z, ambientIntensity);
finalShader.end();

// I added logic to only show spotlight during night
if(show_light){
  fbo.begin();
  fbo.getColorBufferTexture().bind(1);
  light_batch.setShader(defaultShader);
  light_batch.begin();
  light.bind(0);
  light_batch.draw(light, hero.x-l_off+.4f,hero.y-l_off+.2f, light_size,light_size);
  light_batch.end();
  fbo.end();
}
       
// Draw your map here
light_batch.setShader(currentShader);
light_batch.begin();
MapGenerator.draw(gameController.camera, light_batch);
light_batch.end(); 

Night
 Evening

This solution limited me to using one spot light, also my knowledge of OpenGL Shader language is zero. At this point I went back to the LibGDX documentation and came across Box2dLights, a library that uses collision data from Box2D to create lights/shadows.

// BOX2DLIGHTS
private PointLight spriteLight;
private RayHandler rayHandler;

// Create a new Box2D World, this is required. 
World world = new World(new Vector2(), true); 
RayHandler.useDiffuseLight(true);
  
// Setup the new RayHandler, it will use the same camera as the main game
rayHandler = new RayHandler(world);
rayHandler.setCulling(true);
rayHandler.setCombinedMatrix(gameController.camera.combined);
rayHandler.setAmbientLight(1);
 
// Light to follow the hero
spriteLight = new PointLight(rayHandler, 50);
spriteLight.setPosition(hero.x,hero.y);
spriteLight.setDistance(5);
spriteLight.setColor(3, 12, 33, 0.3f);
// Keep the unique ID of the light  
hero_light = spriteLight.hashCode();

// this lights the map (Sun)  
spriteLight = new PointLight(rayHandler, 50);
spriteLight.setPosition(hero.x-20,hero.y-20);
spriteLight.setDistance(250);
spriteLight.setColor(3, 12, 33, 0.5f);
 
// Test shadow being cast by solid object 
PolygonShape tileShape = new PolygonShape();
tileShape.setAsBox(.5f, .5f);
FixtureDef fixtureDef = new FixtureDef();
fixtureDef.shape = tileShape;
fixtureDef.filter.groupIndex = 0;
BodyDef tileBodyDef = new BodyDef();
float bodyX = hero.x-3;
float bodyY = hero.y-4f;
tileBodyDef.position.set(bodyX, bodyY); 
tileBodyDef.type = BodyType.StaticBody;
Body tileBody = world.createBody(tileBodyDef);
tileBody.createFixture(fixtureDef);

// RENDER LOOP CODE
rayHandler.setCombinedMatrix(gameController.camera.combined, gameController.camera.position.x, gameController.camera.position.y,gameController.camera.viewportWidth, gameController.camera.viewportHeight);
rayHandler.updateAndRender();

Here I set up some basic lights, a small one for the hero and a large light to act as the sun, I added one solid object to show a shadow being cast. Would need to add bodies for each object in the game and update there positions. Here the alpha is set to low on the sun light to give impression of night:

Zoomed out, earlier in the day:

Multiple Lights


Accessing and looping through all lights is simple, we stored the hashcode of the hero light so on each render loop update its position, else change the alpha value; increase/decrease this value to simulate night to day and vice versa.

for (Light light : rayHandler.lightList) {
 if (light.hashCode() == hero_light){
  light.setPosition(hero.x,hero.y); 
 }else{
  light.setColor(1, 1, 1, ambientIntensity);
 }
}

Saturday, 26 October 2013

2D Projectile Motion

Recently added trees to the game, when one of these objects is broken it should break down into wood and leaf blocks. I would like these the tree to fall apart and fall to the ground and maybe even bounce. So I need a function where I can apply some force in a direction to any block and make it move/fly/

After some research found a wiki page on projectile motion:

Wiki: Projectile Motion

Here is a simple function that takes a velocity (speed) and an angle and generates all the points through the flight of the object.

Test Function
void projectile(double velocity, double angle, float delta) {    
  double vx, vy, ux, uy, tt, terminal_v;
  double gravity = 9.8;
   
  ux = velocity * Math.cos(angle * Math.PI / 180);
  uy = velocity * Math.sin(angle * Math.PI / 180);  
  terminal_v = uy/gravity;
  
  tt = time_x*time_x;
  vy = uy * time_x - 0.5 * - -gravity * tt;
    
  if (time_x < terminal_v*2){
    Vector2 t = new Vector2((float) vx + hero.x ,(float) vy + hero.y);
    DotArray.add(t);
  }
  
  time_x += delta;
}
ux - the initial velocity accross
uy the initial velocity upwards

terminal_v is the time it takes for the object to stop moving upwards, if you double this you get the total flight time (Given the object takes off from and lands at zero Y).

For each time render is called (usually 60fps) calculate the position of the object at the current flight time and add it to an array.

In the draw part of the code I just draw each co-ordinate held in the array of vectors. This needs work as it only works for positive x (Left to right) and is hard coded to run from the hero current position but this is just a test.

Was unsure how to square a double so just multiples time.
tt = time_x*time_x;
Screen Shot